Friday, August 23, 2013

Do It Yourself: Ikea Coffee Table Revamp | Crafts and Chaos

How To: Wood Top With Instructions and Pictures!


I love our Ikea coffee table. This thing has seen it all. It was a gift to me for my high school graduation and has since had many owners including all my newlywed friends. And with that much love comes scratches, dents, and stains.

It needed a makeover and with our own newlywed budget, a new coffee table wasn't in the plans.

I'm going to talk you through each step it took to create this look. I'll do a quick version if you're a DIY pro and only need materials and I'll do a longer explanation going through each step in detail for those starting out.

Look for bolded tips throughout the tutorial! 

Quick Tutorial

Items Needed:
  • Hand Sander
  • Power Saw
  • Sawhorse and Board
  • Sand Paper
  • Rag or Stain Cloths
  • Stain in the Color You Want
  • Wood Boards Fit to Your Table
  • Exterior Grade Caulk or Liquid Nails  
Directions:
  1. Set up your sawhorses with a board over top and cut boards to length leaving 1/2 inch overhang on each end of the board
  2. Use your hand sander to slightly round the corners and ends of each board. Depending on your wood type sand the top that will be facing up so you have a smooth surface
  3. Wipe down wood with a damp cloth to get all saw dust off. The dust will affect the look of the stain if left untouched.
  4. Once boards are wiped clean, start to apply the stain. Start at the end and make your way to the middle leaving both ends for last. The ends will always stain darker than the top face of the wood.
  5. Once your first coat is on let dry for 1 hour. 
  6. Apply second coat of stain to your desired coloring. For us, we wanted a more "rustic" look so we liked that it wasn't completely even. To each his own!
  7. Once the second coat is completely dry, bring boards inside and line them up on your table top. Arrange boards so the pattern of the wood flows to your liking! When done, keep boards in order but place on floor
  8. Start with your glue source on your table's surface. Make sure that all glue is at least 1/2 inch away from the edge. With the boards pressed down it could seep out if too close.
  9. Once you have an adequate amount of glue, press your first board down and make sure ends line up correctly.
  10. Once first board is in place, run a line of glue along the side that the next board will press against. Run glue on table top for the next board.
  11. Continue this pattern until all boards are glued down. 
  12. Place heavy boards, books, or other flat items on top of table and let sit overnight
  13. In the morning take everything off and enjoy your new table!
Detailed Tutorial With Pictures!

Items Needed:
  • Hand Sander or Coarse Sand Paper
  • Rag or Stain Cloths
  • Stain in the Color You Want
  • Wood Boards - Can use many different kinds | We used Cedar Siding in 1x6x6 (Need two)
  • Exterior Grade Caulk if You Have a Caulk Gun or Liquid Nails 
Directions:


1. First you need to choose your wood. I would suggest going to your local Home Depot. Make sure to take measurements of your table before going so you have the exact number of boards needed. If you go to Home Depot, they will cut your wood for you if you don't have the proper equipment at home.

We used Cedar Siding from Menards that measured 1"x6"x6' which is 1 inch in height, 6 inches wide, and 6 feet long. We only needed two boards since cut in half, it equaled the exact measurements of our table.

Once you pick your wood make sure to lay the boards against each other to see if they are warped or have a bend to them. If you don't do this in the store the boards may not line up when you get them home.

2. Once home, lay the boards on your table to 100% know they line up and that there aren't any defects in the wood. If everything is good then you're ready to start!

3. If you don't have sawhorses available you can easily use two garbage cans or tall boxes to lay your wood across. Start by lining your boards up in a way you like. Make sure the patterns in the wood look good the way you have them laid out.

Start sanding! If you don't have a hand held sander like the picture below you can use a regular piece of sandpaper wrapped around a wood block.


4. Sand down the tops of the planks. (Don't worry about the underside that will be glued down)
This process may take a while if you're doing it by hand. Make sure to evenly sand out any rough spots on the top of the wood. 


 5. Once the tops are sanded to your liking start sanding the ends. If you want a more rough or rustic look do not sand down any further than the picture below. The ends of boards are always more rough so do your best to smooth those out to your liking. 

We made a slight rounded edge on ours and left the bottom of the board flat to get a barn wood look. (Props to my loving husband for all his help!)


6. When all your boards are sanded to your desire wipe them down with a damp cloth. This step is actually really important because the extra saw dust left from sanding can affect the look of your stain. Let the boards dry out from the damp cloth before moving on.


7. You can finally start staining! Use an old rag you will toss after or staining cloths from the hardware store. Start by applying stain at one end of the board and working your way across. Don't start in the middle or your stain pattern may look different once you reach the end. Make sure to leave the ends for last. The end and sides of your board will stain much darker than the top. This is common and will turn out that way no matter what type of wood you use. 

*Remember* to stain the outside edge of your two end boards. DO NOT stain all inside edges or your glue or caulk won't stick as well.


8.  Let your boards dry for at least 1 hour. After that hour look at where your stain is and decide if you need a second coat. For the rustic look two light coats will get you what you want. If you want a more even coat two heavy coats or three light coats will stain even.


 *Remember to stain the ends last!*

We used PolyShades in Bombay Mahogany Satin - This also comes in a gloss from Menards


 *Do not stain insides of edges!*


*If your wood has knots or cool characteristics make sure to stain around the knot if it doesn't lay completely flat to the other board. What will happen is when you line your boards up you will see the unstained inside of the board next to it. Super important!* 


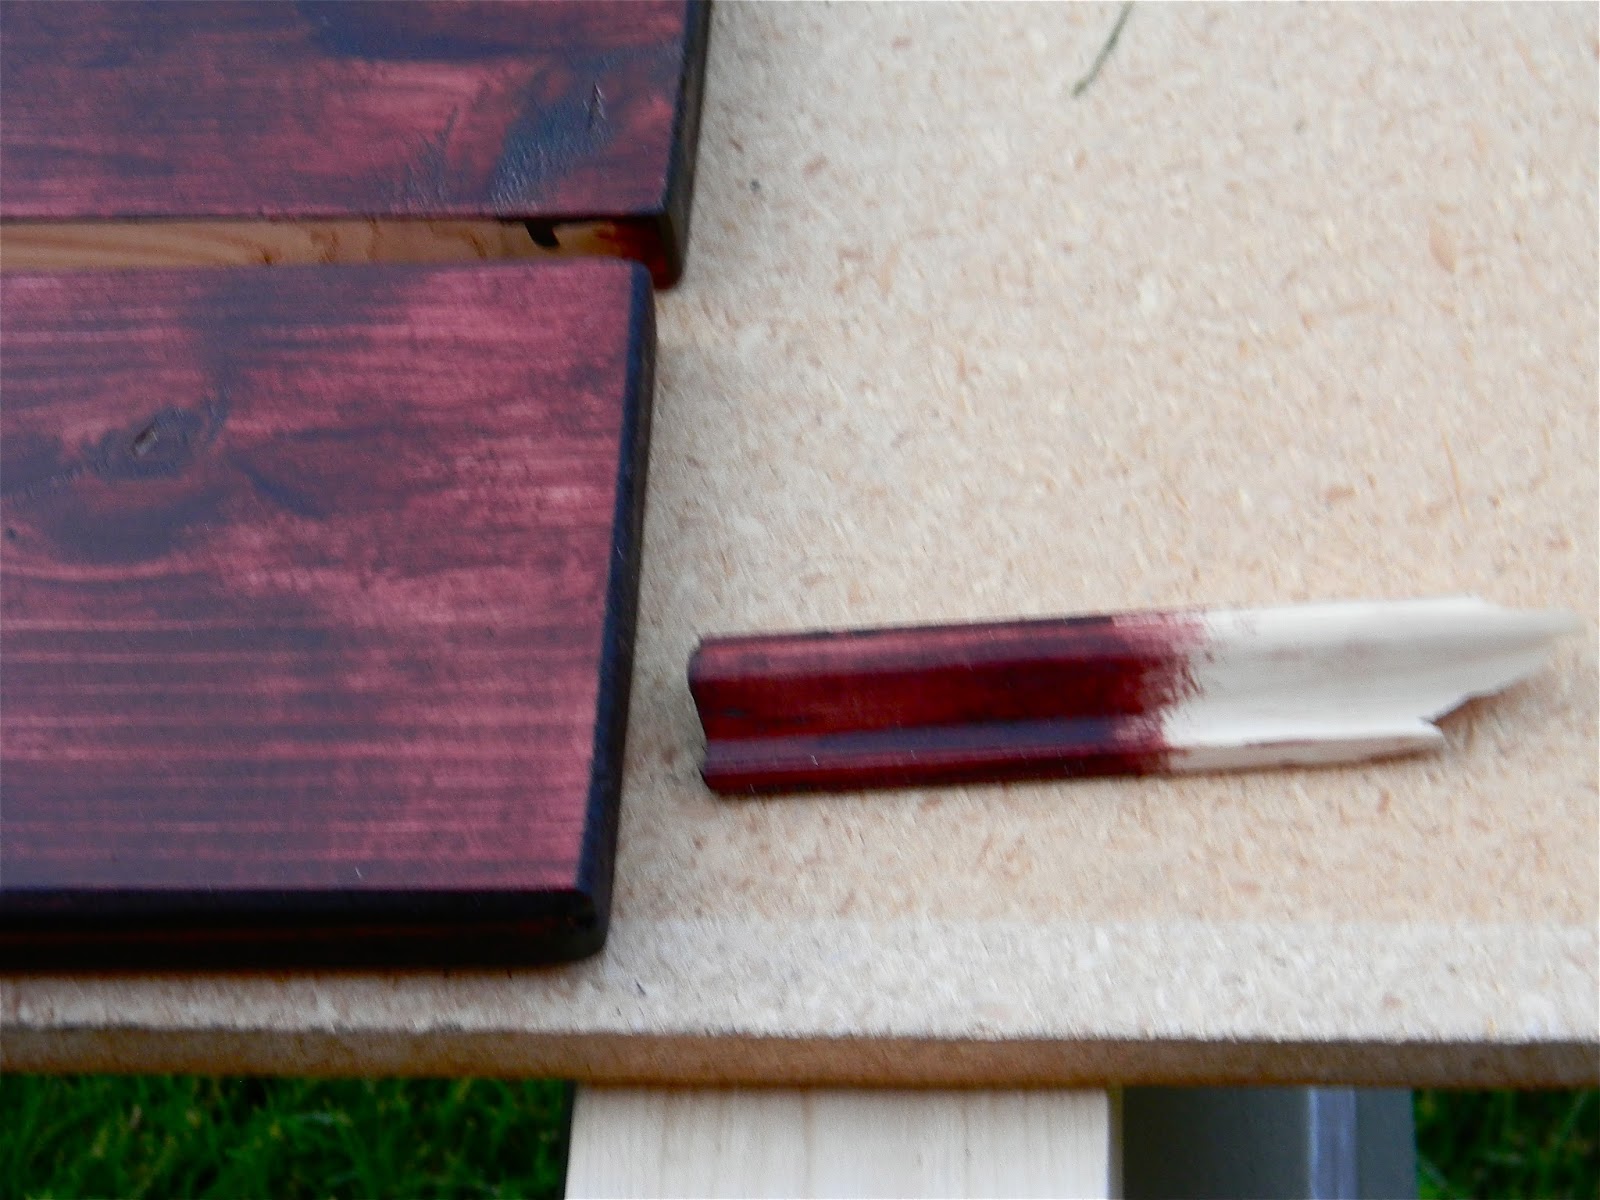
*This shows the stain on a lighter wood - Poplar or Pine - The stain may turn out different on different types of wood. We also used this as our stir stick!

9. Lay boards down one more time on your table. The stain may have brought out features in the wood and you might want them to lay different than you originally thought.


10. Start laying your first line of glue onto your table. Leave at least 1/2 inch between all edges and where your glue sits. If you don't, it could press out when your place your boards and it will be hard to get off. 

11. Lay an entire line of glue that is the width and length of your board. *Note* Don't use Gorilla Glue. Although great for most projects it doesn't adhere as well to lacquer glazed wood. It could cause you problems further down the road.
12.  Carefully place your first board on top of the glue making sure all the edges line up.


13. Run a line of glue along the unfinished inside side of your first board. This will help secure all your boards together for a long lasting effect.


14. Continue this process across the table laying each board snug against the last. Remember to run that line of glue on the unfinished inside of each board.


15. Place heavy boards on top of your glued boards. We used composite board we had in the garage. You could also stack heavy books making sure the weight is distributed evenly. 

Let sit over night 


*Trumpets sound* You're done!


Stay Crafty!

Rina

Thursday, August 22, 2013

Wedding Planning Quick Tips: Budget

Organizing the Beast


You're engaged! Congratulations! You may be wondering where you should begin with the daunting task of planning a wedding. If you look into any wedding planning books or websites they all say to start with your budget. It's easy to get sucked into the decor ideas (Pinterest doesn't help), wedding dress pictures, and fun DIY projects but your first focus needs to be setting your budget.

The First Thing You Need to Do

Sit down with your parents, your fiance, and whoever else is contributing and talk over money. This can be awkward and uncomfortable when you're talking numbers that could buy a house, a car, and a shiny new Louis Vuitton you only see on the runway.

In Your First Discussion

It seems ridiculous to pick an obscure number out of the air and base the next 6 - 12 (in my case 16) months on it. In this first chat simply go over your dreams for the day. Talk about ideas that you've thought of and a timeline. In this meeting pick your date, pick your wedding party, and pick your colors. This will influence the budget because of the time of year, amount of people involved, and type of setting you want.

The national average cost of a wedding in the U.S. is rounding closer to $30,000.00 in 2013. That doesn't mean that yours will be that outrageous and make sure to not see that as the only option.

Pick Your "Must Haves" and "Would Like, But Could Live Without"

"Must Haves" - This is your personal list. Take some time to think about what you really want on your big day. Go to a coffee shop by yourself and look up weddings that inspire you. Pick out your top things you would regret not having. For me, this was food. I wanted to have a memorable meal that would be distinct, delicious, and filling. Another was my photographer. I had to have wonderful pictures with a unique style but that captured moments not poses.

This list is all your own. What do you feel the strongest about? The food, music, church or venue, flowers, cakes, desserts, or decorations? Choose five that are the most important to you.

"Would like, but could live without" - This list will be the things you've seen that would be fun and are great ideas, but if they don't happen you wouldn't be upset. Things that are add-ons like photobooths, guest favors, and extra decorations. Also, choose five of these that you would like to see happen.

Have Your Fiance and Parents Make a "Must Have" List

It's your big day but if your family is helping cover costs they need a say too. Your fiance may want somethings too but may be too shy to speak up. My fiance wanted a slide show video of us. I honestly wouldn't have done it had he not asked! Make sure they feel included in this process and that you'll take their lists to heart as well.

Lay out your list, his, and your parents and rank them of importance. Pick the top five between all lists. These will ultimately be your "big spender" items. 

Get Quotes From Your "Top Five" Lists

Contact a minimum of 3 places for each item on your list. For example say this was your top five list.
  1. Food - Caterer for dinner
  2. Photographer
  3. Venue
  4. Flowers
  5. Cake
Take each item on your list on contact 3 local places that you might be interested in. I suggest using www.theknot.com for their vendor reviews. They have real brides reviews and all the contact information you would need.

This process might take a week so make sure to schedule time for emails and phone calls. 

FYI They will want to know your date and a rough number of guests (always go high)

After you get quotes back you can make an educated guess how much your "must haves" will cost. Once you have that number it will be easy to determine where the rest of your spending costs will fall.

Pick a Number

It can feel like a gamble when you’re talking numbers this high but if you break it down into categories you will come up with a close and reasonable final budget. Use the quotes you have to break down costs. This final number will be what you base a lot of your future decisions on.

Make an Excel Spread Sheet
 
This will become your best friend over the rest of your engagement. Keep track of as many expenses as possible. Not only will this help you track the exact amount of money you’ve spent but it will help keep you in the realm of your original budget. This is hard work and not to be taken lightly. If you let things slide you will over spend and over exert your resources that may later end up cutting something you really wanted off your "Would like"  list as in a photobooth or better decorations. Excel has a handy pre-formated "wedding budget" worksheet that you can customize to what you need. 

I used this for my own wedding and broke everything down into small categories so I knew where every penny was going. It was easy to make decisions on bigger items because I knew where I was in every other aspect of costs!


Do Not Get Stressed Out

This is the hardest part of the whole big picture and once it's done you will be able to enjoy the planning process with ease because you will have a firm grip on expenses. You will have a realistic view of what can be bought and what can wait for later.

Do not let this slide. I promise you keeping track will relieve all the stress in the end because there will be no surprises with costs.

When you're done. Go get a drink because you deserve it!  


Wednesday, August 21, 2013

Washday Wednesday: Household Secrets

Quick Way to Save Closet Space 

Scarf Organizer  


If you're like me then you have way too many accessories that take up space in your bedroom, closet, or bathroom. Here's a quick and practically free way to save a little space.

I counted how many scarves I own. 16. Not winter ones that have practical uses, but ones that look good with one or two outfits. Sixteen! I decided it was time to get those out of the box under my bed so I would get some more use out of them!

Items Needed:

  • Round shower hooks - You can find these at Target or even the Dollar Store
  • A sturdy hanger - I recommend a thick plastic one or a wooden hanger

Directions:

  1. Simply clip all the shower curtain hooks around the hanger
  2. Feed Scarves through the loops until hanging even on each side
  3. Hang inside closet or use a 3M adhesive wall hook to display scarves inside a closet wall for a  better visual!
This is a simple way to eliminate a box in the closet and also keeps them organized and neat. It's easy to forget about them when they're tucked away! Here you can easily choose your statement scarf!


Feed scarf through shower hooks for extra space!

I love how much room this frees up in my closet! Check back for more household secrets and tips!

Stay Crafty!

Rina

Tuesday, August 20, 2013

No Sew Pillow Cover | 45 Seconds


Easy Pillow Upgrade in Under a Minute 

I had these gray/green/olive shade pillows from my previous apartment and the color (which seemed to mysteriously change in different light) didn't go with our new furniture.

This project is ridiculously simple and gets those extra scraps of fabric out of your craft stash. I admit I have a problem collecting fabric remnants so coming up with a new pattern wasn't a problem.

Things Needed:

  •  Old Pillows in need of some TLC 
  • 1 Single cut yard of fabric per pillow

 Directions:

  1. Lay pillow in center of fabric (Make sure the fabric pattern is face down)
  2. Fold in the fabric to the center of pillow making sure the fabric lines up and there are no wrinkles
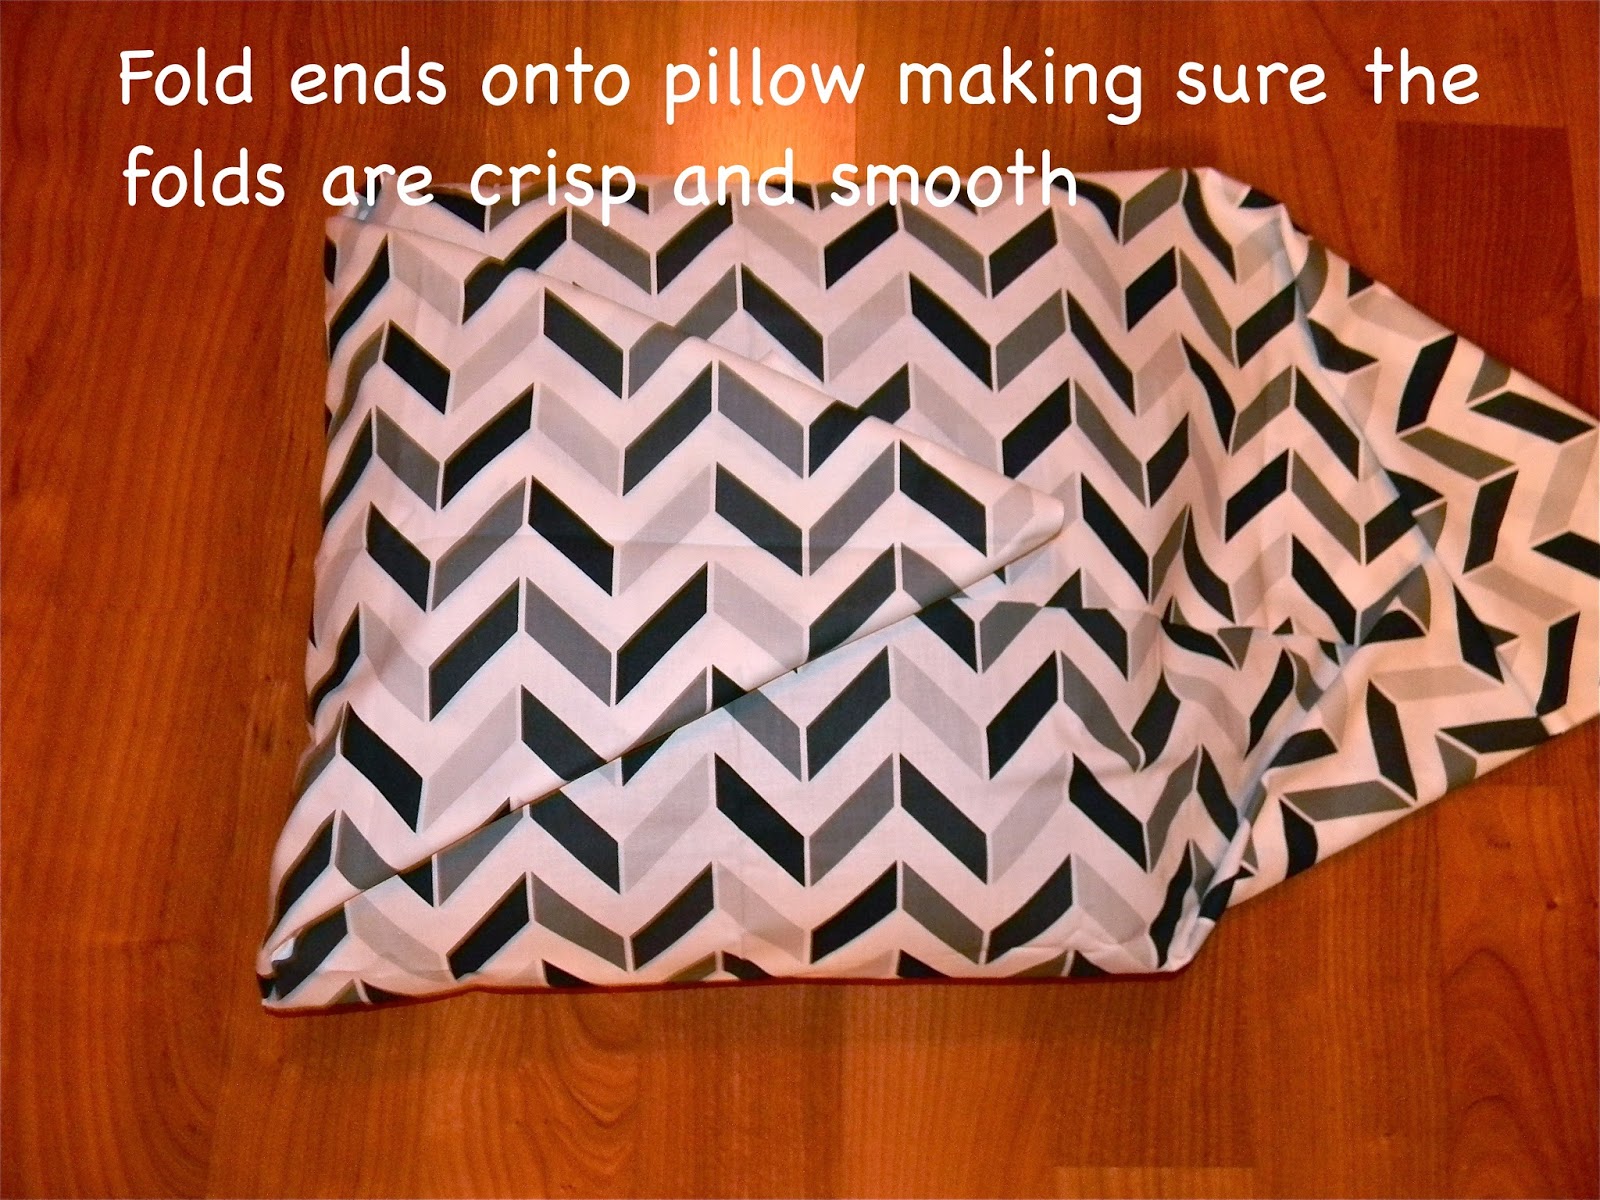
  3. Fold ends on each side so they come to an even point 
  4. Fold ends onto pillow making sure the folds are crisp and smooth
  5. Tie a knot 
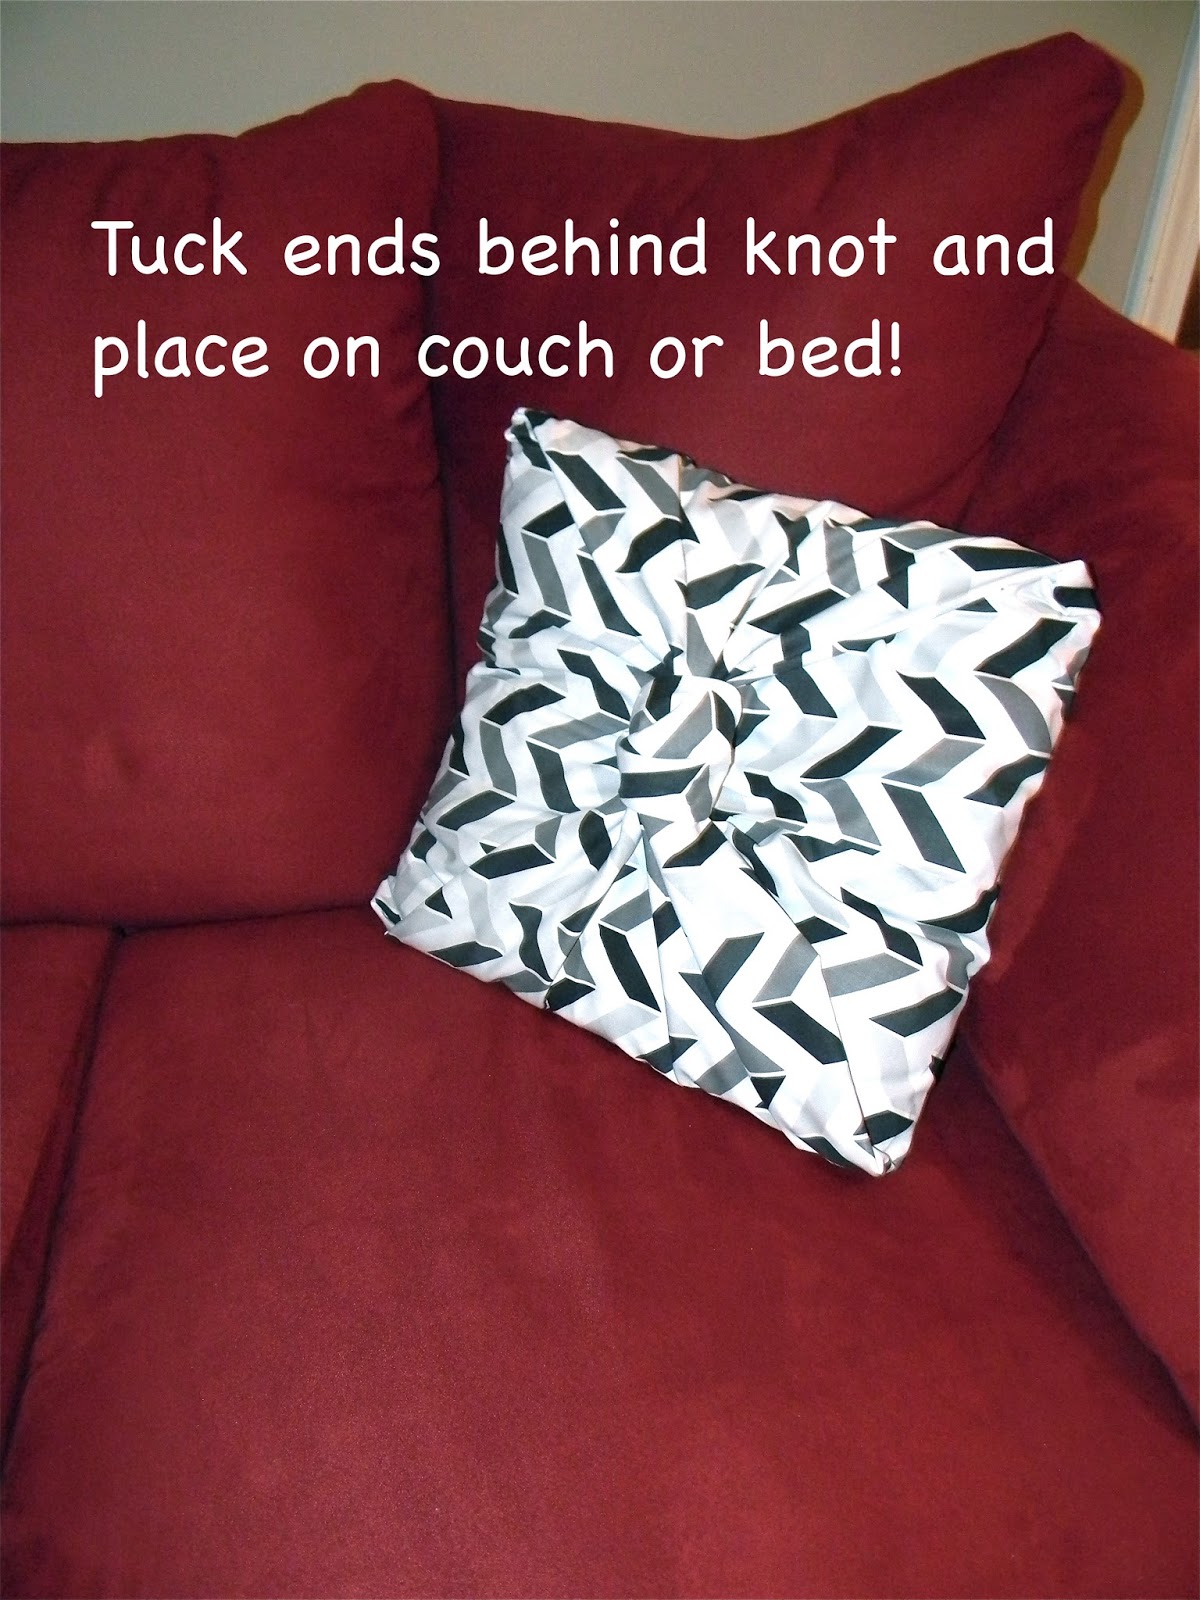
  6. Tuck ends behind knot on pillow
  7. *Option* If you have kids who like to throw pillows around (or at each other) you may want to use a safety pin to secure the back of the knot to the pillow. Make sure it's hidden from view! 
  8.  


    Simple as that!

Monday, August 19, 2013

Wedding Planning Quick Tips - Just Engaged

Combating an Overly Excited Battalion 

How to appease question happy family and friends when you tell them about your engagement


When you first get engaged it's overwhelming in an instant. Everyone wants to know your exact decisions that first day.

What's your date?
What are your colors?
Are you going to have a dancing pony?

And then they want to tell you about a wedding disaster they encountered. "I had a friend who dropped her entire dinner plate on her dress! It was a catastrophe!"

Fantastic. Because in your happy afterglow that's what you want to hear.

You need to put up a defense against these well meaning relatives and friends.

Simply reply, "I'm not sure of our plans yet but thank you for your interest. When I know I'll share some details." Give them a smile and move onto someone else.


Family, while laced with good intentions, usually has a way of ruining good moments by the much feared smothering effect.

Step Away

Take a moment with just your new fiance and yourself to enjoy your happy news. Although your family just found out, it's still new for you too. Soak in your happiness and marvel at your amazing future together.

Remember to Smile

It can be surprising how stressful sharing the happiest moment of your life could be. Remember everyone is there for the two of you (even though cousin Amanda is driving you nuts comparing her wedding to your unplanned future affair). This moment isn't just yours now. Everyone will want to be apart of your day. Keep that smile up!

Make Sure to Thank Everyone

With the tidal wave of hugs, kisses, and tears it's hard to remember to say thank yous. In your excitement make sure everyone knows you want to include them too. The mothers always need reassurance that they will have a hand in your big day no matter how far away that may be.

And finally,

Breathe.

Make a date with your new fiance (eeek!) to get dinner and talk about anything else than the wedding. Make sure to keep your relationship and the wedding separate. The planning will soon take over your life and it is extraordinarily important to keep a balance between your social life and organizing your planning schedule.

Make a date for yourself as well. You just got engaged! Celebrate! Get a much needed massage. Go get that nice pair of shoes you've been drooling over. Treat yourself to an ice cream. This time is about you and your happiness. Keep the happiness afloat while you go into planning mode.

Savor everything.

Rina

Johnna Harmer Photography


Friday, August 16, 2013

The Easiest Candle Makeover Ever


Happy Friday!

I had a few pillar candles hanging around the house and I thought I would do a quick revamp! Hardly any time and it adds a simple fix to a boring candle!

Things Needed:  
  • Pillar Candles - Can be any size or color
  • Yarn - You'll need about a yard per candle
  • Beads - for end of yarn 
 Directions:
  1. Cut 1 yard of yarn per candle
  2. Start wrapping yarn around center of candle. You'll want to leave about 6 inches on the one end and start wrapping the yarn around the base while keeping the 6 inch section straight to the top of the candle.
  3. Once you've wrapped the yarn all the way around the candle tie a knot at the top where the bow will go.
  4. Tie beads to end of yarn - cut extra yarn off ends of beads
  5. Tie bow with beads hanging at different levels
  6. Easiest 2 minutes of your life. You're able to do this to any plain candles around the house! 
Start with yarn in the middle of candle

Wrap string with both ends at the top

Tie on beads to the ends

Add to table or bookcase!


Wednesday, August 14, 2013

Getting back to normal.

Hello, hello!

Uffda it has been a while! In the wake of my wedding and purchasing our first home, I have finally had time to come back to my blog. Getting married was wonderful but my brilliant idea to hand make most of the wedding was not. Sprinkled in I will show you a few of my wedding decor projects and how I not only created them but how I mass produced them. I've learned in our 16 month engagement that you can't put anything off that you have your heart set on.

My best advice to anyone whether you're doing a project for your home or if it's something for your wedding is to finish what you start. I can tell you that those are the most satisfying. The best ideas you have being finished and tangible.

Check back every few days for tips, projects, and how-to creations.

Stay Crafty!

Rina